Tips & Tricks on how to use your MacBook
Are you new to Mac?
Below are some Mac basics to help you get started. Additionally, you can watch this Mac Tutorial for Beginners 2024 video for further assistance.
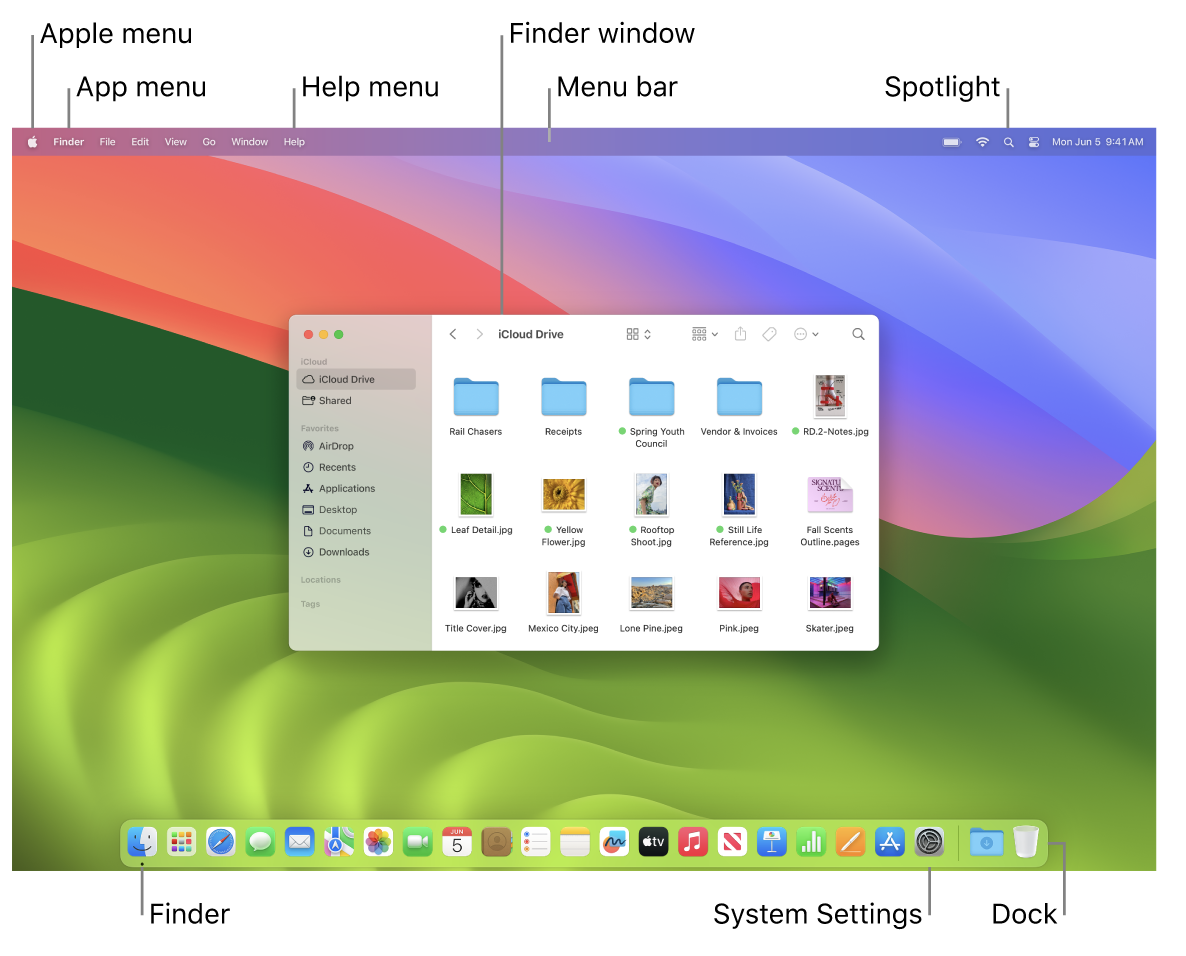
- The menu bar: The menu bar for the desktop or the active open app is always at the top of the screen. Use menus to find options and perform tasks in apps. For information about items in the menu bar, such as the Apple menu and the Help menu, see the Desktop and menu bar on your Mac.
- The Dock: The Dock is similar to the taskbar and Start menu in Windows and appears at the bottom of the desktop (but you can change its location in System Settings). The Dock makes it easy to see all the apps you have open and quickly launch your favorite apps. To open an app, click its icon in the Dock. You can also open apps using Launchpad. See The Dock on your Mac.
- The Finder: Click in the Dock to open the Finder, where you organize and locate your files (similar to File Explorer in Windows). Use the buttons at the top of the Finder window to change how you view your files—as icons , in a list , in columns , or in a gallery . In any view, you can select a file and press the Space bar to see a Quick Look preview without opening the file. See Finder on your Mac.
- The Spotlight menu: Spotlight lets you search for anything on your Mac, including documents, contacts, email messages, and more. You can also launch apps and search on the web. To open Spotlight, click the Spotlight icon at the top right of the screen or press Command-Space bar. See Spotlight on your Mac.
- System Settings: System Settings is similar to the Control Panel in Windows. Customize your Mac with settings for the desktop, Dock, display, Bluetooth, network, and much more. See System Settings on your Mac.
Mac keyboard shortcuts:


Maximize, minimize, & close windows:
Maximize, minimize, and close windows. You can have multiple windows for an app open at a time. Use the buttons in the top-left corner of a window to resize and close windows.

- Click the above icon to close window (or press Command-W to close the window), but not the app. Press Option-Command-W to close all open windows for the app. Press Command-Q to quit the app.

- Click the above icon to minimize the window (or press Command-M). Minimizing a window leaves the app open but reduces the window to an icon on the right side of the Dock. Click the icon to restore the window to its previous size.

- Click the button above icon to do a full-Screen. To maximize the window, hold the Option key and click the button. Or hover on the button to see more options, such as tiling the window. Press Esc to return the window to its previous size.
MacBook Air Trackpad:
| Gesture | Action |
| Click: Press anywhere on the trackpad. Or enable “Tap to click” in Trackpad Settings, and simply tap. | |
| Force click: Click and then press deeper. You can use force click to look up more information—click a word to see its definition, or an address to see a preview that you can open in Maps. | |
| Secondary click (that is, right-click): Click with two fingers to open shortcut menus. If “Tap to click” is enabled, tap with two fingers. On the keyboard, press the Control key and click the trackpad. | |
| Two-finger scroll: Slide two fingers up or down to scroll. | |
| Pinch to zoom: Pinch your thumb and finger open or closed to zoom in or out of photos and webpages. | |
| Swipe to navigate: Swipe left or right with two fingers to flip through webpages, documents, and more—like turning a page in a book. | |
| Open Launchpad: Quickly open apps in Launchpad. Pinch closed with four or five fingers, then click an app to open it. | |
| Swipe between apps: To switch from one full-screen app to another, swipe left or right with three or four fingers. |


